
Friday, April 25, 2014
Monday, April 21, 2014
Easter eggs
I've always liked the idea of Easter eggs, mostly because I'm a mad fan of the deviled eggs. The days after Easter are filled with deviled eggs at every meal. Mom made hers with finely-minced sweet pickle and the obligatory sprinkle of paprika over the top. They were enough work that they were special occasion fare, with usually a small tray at Thanksgiving and Christmas. The rest of the year? Nary an egg of the deviled variety to be found.
I was cruising around the web the other day and spotted an ad from Schillings for the custom colors you could mix using their Neon food coloring drops. I always wanted to do vibrant colored eggs just once. As a kid, we didn't use a high enough concentration of the stuff or have enough patience to really get bright eggs. So, I decided to have some fun. One of the things that attracted me to the ad was the lack of the usually obligatory Photoshop job that is rampant in advertising. For example, the white band on the egg from a thick rubber band used during dying wasn't a professional-looking, Martha Stewart perfect, crisp line. In fact, you could see fuzzy edges from bleeding dye and flaws where the band had shifted. Similarly, the white polka dots were more oblong and funky. I liked it. It seemed doable.
So, armed with two dozen white eggs I had cooked up the night before, I poured myself a cup of coffee and set about it. First thing I found? The instructions say, 'use 1/4 teaspoon food coloring.' However, their custom color recipes give ratios that come up to decidedly less than 1/4 teaspoon. So, I winged it. After the first color, I figured out that 1/4 teaspoon is around 26-27 drops. I just counted them out in the cup and went to whatever multiple of that color's ratio was close.
 I'm funny when it comes to arts and crafts. My skill level is hit and miss. I can pick up one random project and knock it out like I've been doing it my whole life, and then pick up another and it ends up looking like a 5-year old given an espresso and a puppy did it while having a meltdown. Stylish. I decided to try the rubber band and rubber cement trick I'd seen done.
First of all, you cannot get a round spot from the brush in the rubber cement jar. I'm just going to say that right now. A half a dozen diseased-looking eggs later, it finally hit me. I needed a stamp. In true 'me' style, I looked around for whatever was handy. On the counter, not too far from where I left a pile of leftover parts and tools used in installing a power-outage night light in the kitchen (very handy for midnight snacks in an arctic hurricane, I highly recommend picking some up at Costco), I found this little rivet-shaped piece of plastic. You can see it up there on the counter to the left of the glass tray of dyed eggs. I dabbed the flat top into a bit of rubber cement and touched it to the egg. I found that if I didn't overload the thing and if I didn't mash it down too hard, it left a nice even disk of rubber cement that dried pretty quickly.
I'm funny when it comes to arts and crafts. My skill level is hit and miss. I can pick up one random project and knock it out like I've been doing it my whole life, and then pick up another and it ends up looking like a 5-year old given an espresso and a puppy did it while having a meltdown. Stylish. I decided to try the rubber band and rubber cement trick I'd seen done.
First of all, you cannot get a round spot from the brush in the rubber cement jar. I'm just going to say that right now. A half a dozen diseased-looking eggs later, it finally hit me. I needed a stamp. In true 'me' style, I looked around for whatever was handy. On the counter, not too far from where I left a pile of leftover parts and tools used in installing a power-outage night light in the kitchen (very handy for midnight snacks in an arctic hurricane, I highly recommend picking some up at Costco), I found this little rivet-shaped piece of plastic. You can see it up there on the counter to the left of the glass tray of dyed eggs. I dabbed the flat top into a bit of rubber cement and touched it to the egg. I found that if I didn't overload the thing and if I didn't mash it down too hard, it left a nice even disk of rubber cement that dried pretty quickly.
 I lowered it into the dye and kind of bobbed it up and down for a while, working all the surface bubbles off in an attempt to get even color. I noticed that the instructions Schillings give say to mix your dye lot up with boiling water. However, I noticed that as the dye lot cooled to room temperature there were less and less bubbles forming on the eggs while they sat in the bath. The problem with bubbles is that they form after the egg hits the dye. So, when you pull the egg out to dry, everywhere there is a bubble, the egg is a lighter color. You can really see it in later pictures below. The egg I'm describing here was the last in the turquoise dye and didn't develop many bubbles at room temperature.
 It worked! You can see the rubber cement is repelling the dye. Once it was completely dry, I pulled off the rubber bands and used my thumb to roll the rubber cement off the egg.
 It didn't turn out too badly. Where the knots on the rubber bands were, to make them small enough to fit the egg snugly, dye seeped underneath. But, all together, I think it looked pretty good for a project to do while Pebbles napped. When she woke up, everything was dry and ready to hide for her.
 And, by hide I mean 'put out in plain sight'. Hey, give her a break, she's not quite a year old! She did get one egg in the bucket that her Papa was holding for her, but mostly she picked them up and dropped them after drooling on them a bit. Several cracked.
 Mama? Can I play with the dyes? I promise not to pour them on the dogs!
It was a pretty fun diversion from unpacking. I really didn't want to have to tell my parents that I didn't do anything for their Granddaughter's first Easter. I'm already having her 1st birthday party 2 weeks late, just to give me a chance to have a party with people not sitting on boxes.
As for the eggs?
Mama? Can I play with the dyes? I promise not to pour them on the dogs!
It was a pretty fun diversion from unpacking. I really didn't want to have to tell my parents that I didn't do anything for their Granddaughter's first Easter. I'm already having her 1st birthday party 2 weeks late, just to give me a chance to have a party with people not sitting on boxes.
As for the eggs?
 Martha Stewart couldn't do better if you gave her an espresso and a puppy.


Thursday, April 17, 2014
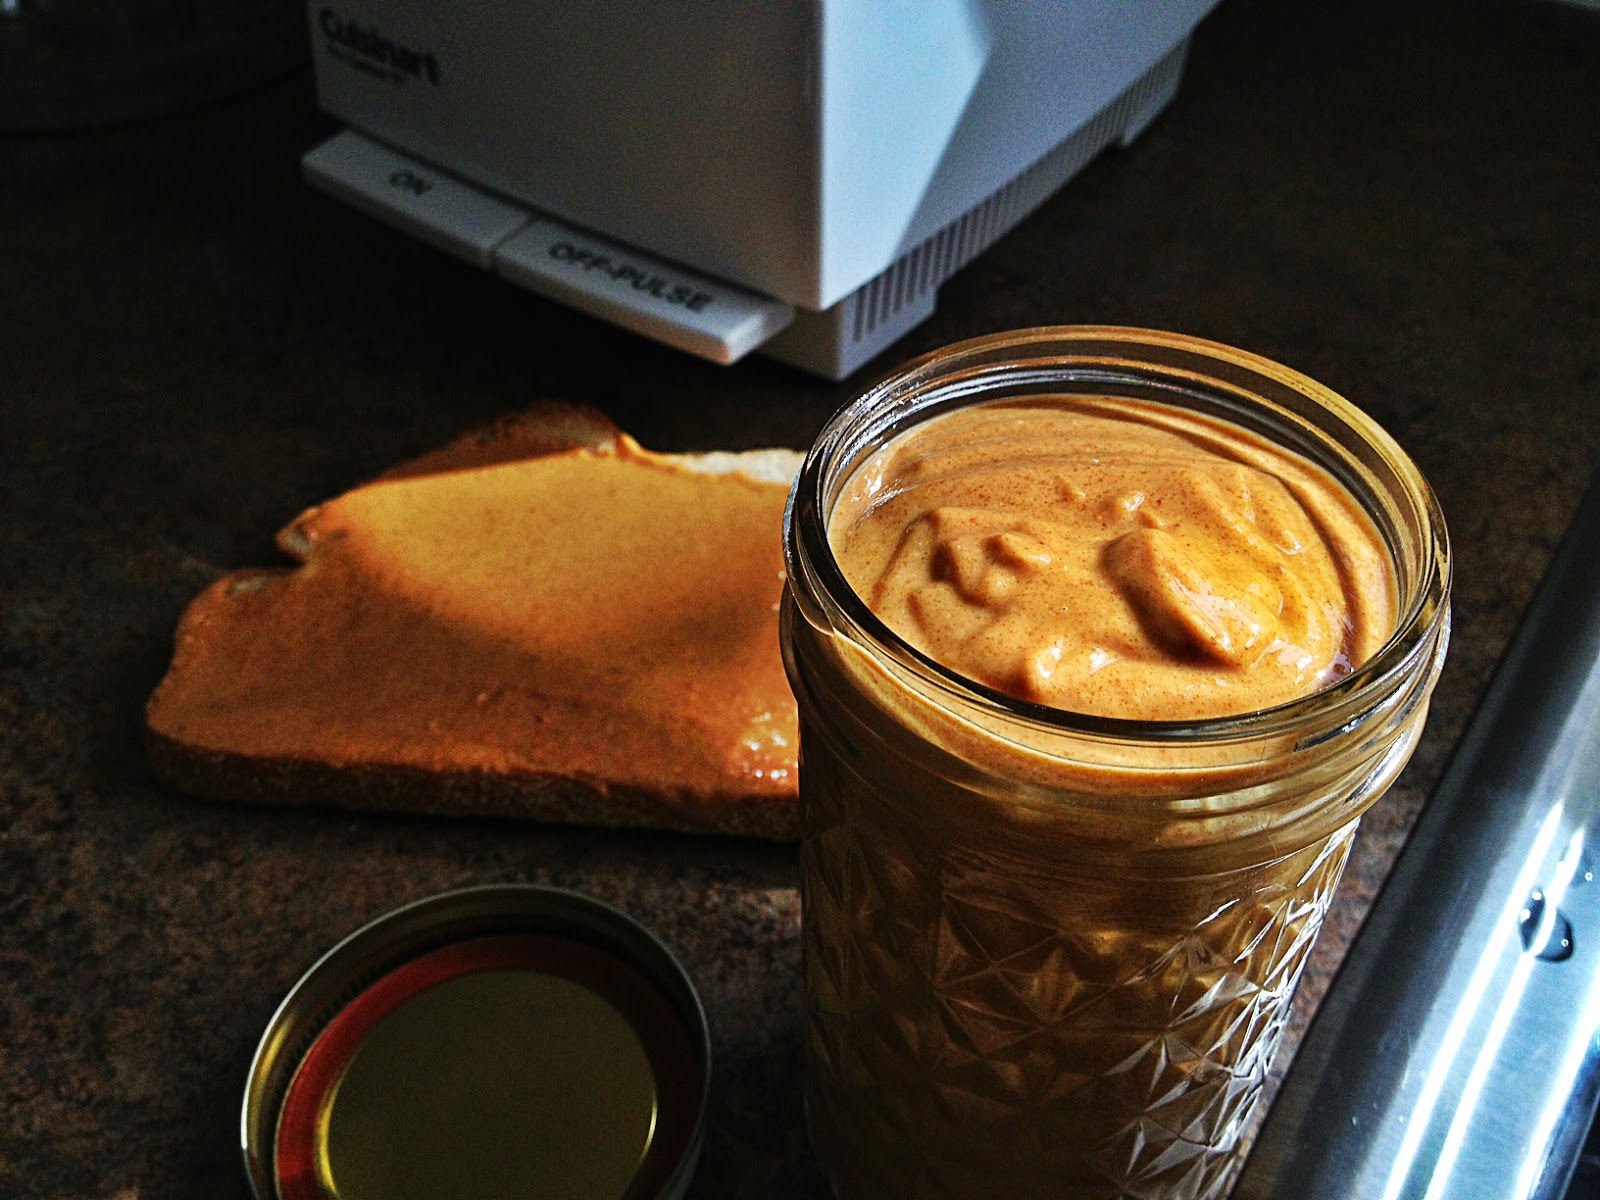
Sticky fingers- homemade peanut butter
Pebbles likes peanut butter.
I mean she really, really likes peanut butter. When she was smaller, the only way I could keep her entertained long enough to get the dishes done was to feed her peanut butter toast with her breakfast. Those sticky toast soldiers kept her busy for a solid 10 minutes. The only issue I had was that she'd be hollering for her food before I'd had my coffee, and I'd by gamely trying to spread peanut butter and pick out all the peanut chunks (we're chunky peanut butter lovers here) so she wouldn't get one stuck in her tiny throat, and I'd be losing my damn mind because of the crying and not being able to move fast enough to stop it...
No more.
When we moved into the new house last week and I was packing the last of the kitchen staples at the old place, I took the opportunity to chuck that last tablespoon of chunky peanut butter at the bottom of the jar, just so I wouldn't have to move it. This morning I was making my shopping list and started to put peanut butter down, but got to thinking about a pin I'd spotted recently. According to the blogger, homemade peanut butter was as easy as throwing peanuts in a food processor and turning it on.
Now, I remember homemade peanut butter from when I was a kid growing up in the 70s, and it was not the rich, smooth, delightful spread she touts in her recipe. I remember gloppy, grainy, oily nastiness that use to drive me to beg my mom to just buy Jif. She didn't try to make it again, but she stuck with Laura Scudder's Natural for years. It had this inch thick slick of oil on top that was impossible to stir back in. Blargh.
Well, I read through her instructions and I think I figured it out, where my mom went wrong that is. If you'll forgive the pun, the sticking point is that you have to grind the peanuts down to a peanut butter-like paste, but you can't stop there. After the peanuts are all ground down and have formed a ball, you have to keep going, and keep going, and keep going. After a few more minutes, the ball suddenly disappears and you get this wonderful, smooth, liquid peanut butter. No oil added, remember? Just peanuts. The blades of the food processor go for so long that the peanut butter becomes heated. Once you pour it into a jar and stick it in the fridge, it thickens back up. No added oils, no added stabilizers to compensate for the added oils. Just peanuts, transformed.
 You can find the full recipe, with detailed photos of each step of the grinding process here at Averie Cooks
I will do some things differently next time. First and foremost, I will change the peanuts I use. I liked her idea of using honey-roasted peanuts. However, there are no Trader Joe's up in Alaska. So, all I had to work with in the honey-roasted variety was good old Planters. The result? Too sweet. I like sweet, but this is dessert peanut butter. I'll be using it largely in peanut butter smoothies and shakes, and spread on tart apples. Next time I'm going to use plain dry-roasted peanuts from the bulk section at the supermarket and adding my own honey to taste. As an added bonus, it's half the cost of Planters and without all the extra ingredients. Just peanuts.
Something Pebbles approves of.
You can find the full recipe, with detailed photos of each step of the grinding process here at Averie Cooks
I will do some things differently next time. First and foremost, I will change the peanuts I use. I liked her idea of using honey-roasted peanuts. However, there are no Trader Joe's up in Alaska. So, all I had to work with in the honey-roasted variety was good old Planters. The result? Too sweet. I like sweet, but this is dessert peanut butter. I'll be using it largely in peanut butter smoothies and shakes, and spread on tart apples. Next time I'm going to use plain dry-roasted peanuts from the bulk section at the supermarket and adding my own honey to taste. As an added bonus, it's half the cost of Planters and without all the extra ingredients. Just peanuts.
Something Pebbles approves of.
 Next up: Not sure. Perhaps a tour of the half-unpacked house?

Wednesday, April 16, 2014
Trying again with a new attitude!
Alrighty then.
I've got a cup of coffee and I've pushed up my sleeves. It's time to get serious about this blog business. I've got this Canadian Housewife I know who's been pestering me (nicely) to get back to blogging, so she can keep up with this Alaskan Housewife.
The past, oh my goodness, two years have been nuts. After the loss of our twins, we went through IVF and after an uneventful pregnancy and a worrisome birth and recovery, we were blessed with a healthy baby girl. Pebbles is about to turn one and raising her has been a wonderful, tiring, hilarious, overwhelming and, at times, frightening privilege. I didn't come through the pregnancy unscathed, and have undergone a few surgeries to try and get on track to try for a sibling. More on that some other time.
In addition to raising our daughter, we have just bought our first home! We moved to Alaska a few years ago and chose to lease a house rather than buy right away, so we could get to know the area first. We finally decided to start looking after the first of the year, and were greatly surprised to find the perfect home after just a month of looking. We closed and moved in a week ago, and I am still unpacking and cleaning. This house is in great shape with recent renovations of kitchen and baths, but it need a lot of work this summer. I'll be documenting it here.
So, from cooking, to home customization, to building a bear-proof chicken coop, Campfires and Caribou is finally back online!
Subscribe to:
Posts (Atom)